 Hey all, today I have a look that is wearable for all special occasions. Whether it's a date night, Christmas, New Years or even Halloween which is around the corner!
Materials Used:
Face:
1. Nars Pure Radiant Tinted Moisturizer in Medium (Sephora $42.00)
2. Revlon Colorstay Aqua Finishing Powder (Target $14.99)
3. Andy Warhol for Nars Illuminating Blush in Satellite of Love (Sephora $29.99)
4. Nars Blush in Super Orgasm (Sephora $29.99)
5. Revlon Eyebrow Pencil in Medium Brown (CVS $5.00)
6. Benefit's Watts Up Highlighter (Sephora $30.00)
Eyes:
1. NYX Cream Eye Primer in Pearl (Beauty Store $6.00)
2. Makeup Forever False Lashes in #156 (Sephora $16.00)
3. Eye Glitter Pot in Disco (Halloween Store $4.50)
4. Kat Von D Eyeshadow Palette (Sephora $20.00)
5. Kat Von D Eyeshadow in On the Road (Sephora $16.00)
6. Tara Tarantino Sparklicity Powder in Opal (Sephora $11.00)
7. Makeup Forever Aqua Shadow in Black (Sephora $20.00)
8. Sephora Jumbo Mascara (Sephora $12.00)
9. Urban Decay Heavy Metal Eyeliner in Spandex (Sephora $16.00)
Lips:
1. Kat Von D Liquid Lipstick in Lolita (Sephora $19.00)
2. Kat Von D Foiled Liquid Lipstick in Forever and Never ($19.00)
Don't be alarmed by the amount of materials! I happen to have a ton of makeup and just used whatever I had to my advantage. You can use any colors you want.

First, I applied the Nars foundation and set it with the Revlon powder then lined my eyebrows.

Next, I applied Nyx cream eye primer all over my lid. Taking the eye glitter pot, I carefully applied the glitter to the inner portion of my lids. Be very cautious when applying glitter. It can fall into your eyes and cause a lot of pain! Pat it down firmly to make sure it doesn't flake off Then taking Kat Von D's True Romance Palette I used Hyper Ballad (Pearlized Silver) mixed with Scandinavian (Pearlized Taupe) in the center of my lid. Using Ville (Pearlized Eggplant Purple) I blended it into the other two eyeshadows.

Finally, I took Kat Von D's Eyeshadow in On the Road and applied it to the outer-most corner of my lids and blended it into the middle. To bring back the 'sparkle' effect, I took the eye glitter pot and with a small amount, I lightly dusted over my whole lid. Using Makeup Forever Aqua Shadow and an angled eyeliner brush, I lined my eyes. Taking Urban Decay's Heavy Metal Eyeliner, I lined the inner corners of my eyes, then using Tara Tarantino's Sparklicity powder i dabbed the opal powder on top of the wet eyeliner for a multi-dimensional sparkle.
I then applied my false eyelashes and a coat of mascara. To get a soft natural glow, I used Andy Warhol for Nars Highlighting blush all over my face. Focusing on my temples, the hollows of my cheeks and my forehead.

Then taking Nars Blush in "Super Orgasm," I defined my cheeks. Sometimes the color of the blush is too bold, so I went back and re-applied the highlighting blush all over for a more muted effect.
In Picture 13, I drew a line down the bridge of my nose with Benefit's Watts Up Highlighter. This will help give my nose a defined look. Then taking a medium brown shadow, I shaded the sides of my nose and blended.
To finish off the look, add any accessories and you're good to go!
I hope you guys enjoyed this tutorial and have fun!
- Hyuns
Hyun-Ha is a lovely soul and photographer based in the Philadelphia area. She has a really cute dog and is the sweetest girl you will ever meet. Follow her on Instagram for daily makeup inspiration, @hyunnybuns.


 Begin by spreading the lightest color (I use an ivory) from the eyebrow all the way down to the crease. Brush the second lightest (I use a brownish light grey) over the lid. Then, add the darkest (I use black) around the edges and blend it into the crease. For the eyeliner, use liquid and bring it all the way from the tear duct to the little "swoop" on the edge. Smudge some pencil liner along the bottom lash line and add mascara as you usually would.


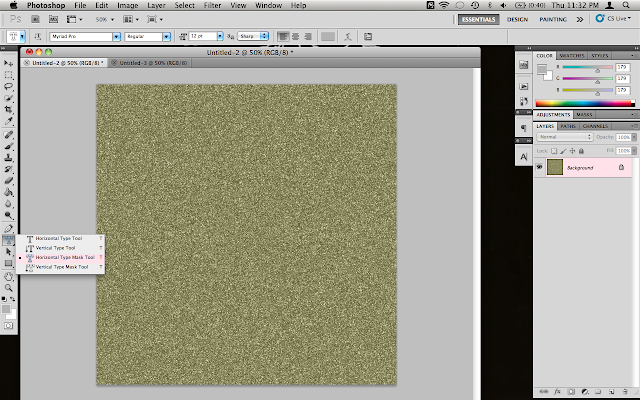 To begin, you're going to need some glitter.
 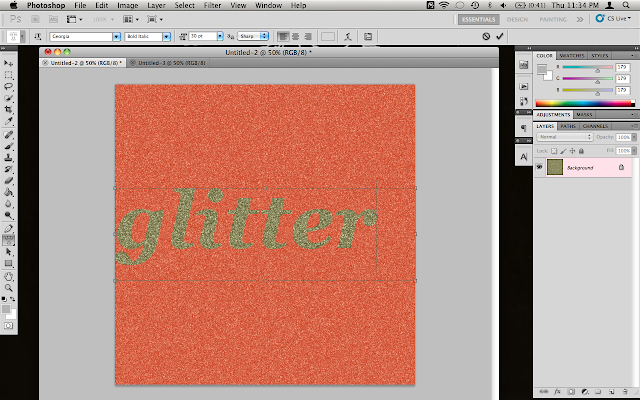 Once you create your text box, the glitter will turn red. Type in the word that you want and adjust the font and size to your liking.
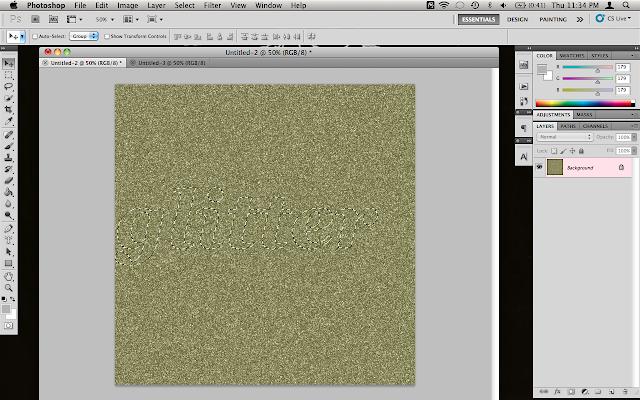 Once you click out, there will be a marquee outlining your text. Copy that! (I like to use the good 'ole command + c but you can go up to the edit menu also.)
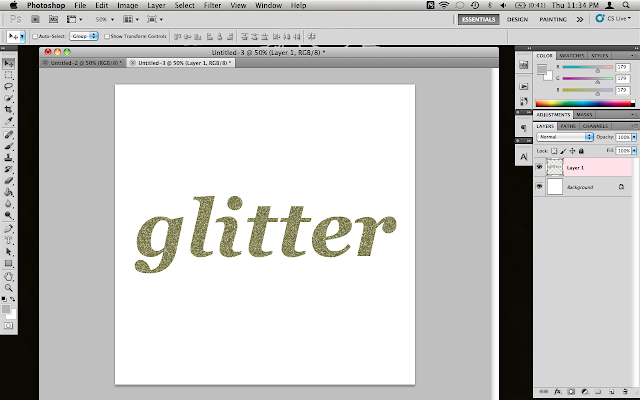 Paste your test into the new document. Resize, rotate, go crazy with it.
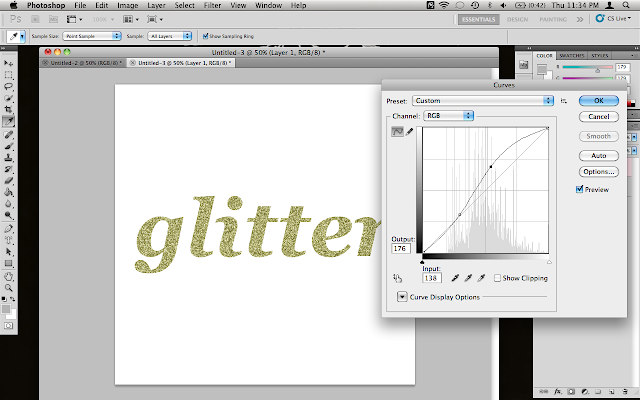 Use Curves to adjust your glitter to exactly how you would like it to look. As you can tell, I lightened mine up a bit. Play around and see what you like best!
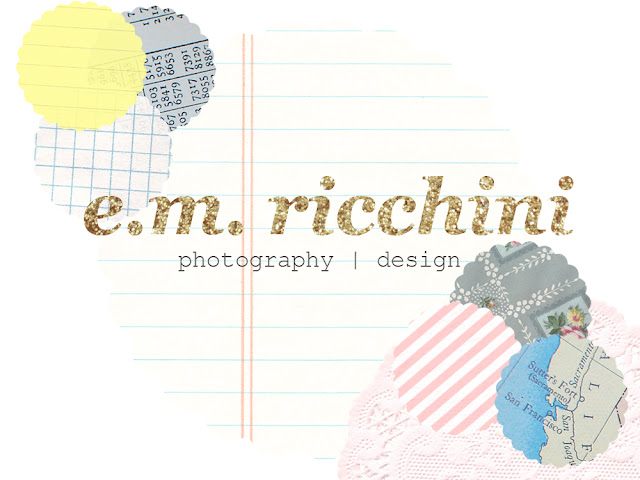 Here it is in action! Have fun playing around and creating glittery works of art!


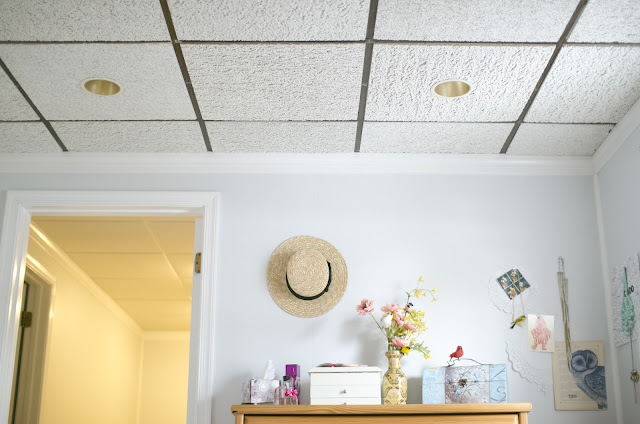


 30mm f/1.4: This lens is my absolute favorite. I'm actually the only photographer that I know of who shoots mostly with a 30mm, which I just don't understand because it is an incredibly versatile lens that I find is perfect for portraits. In fact, 90% of the photos on this blog were captured with this lens. This lens is fixed, which means that it doesn't zoom. If you're unfamiliar with that, it can take some getting used to but I've found that my eye for composition has improved exponentially since shooting with a fixed lens.
 50mm f/1.8: This was one of my first lenses and I will always hold it close to my heart. It's another fixed lens but the depth of field is so dramatic, you won't miss the ability to zoom at all. Most of the photographers that I know rely heavily on a 50mm lens. I've heard good things about the 50mm 1.4 lenses but the 1.8 is perfect for beginners because it is extremely affordable. Like, under $120 affordable, and it's not a bad lens at all.
  70-300mm: This is a tough lens to shoot indoors with because it doesn't function very well in low light but it is really great for outdoors. In this photo, it's not zoomed in at all, it can zoom in pretty far. I call it my "stalker lens." I like using this one to take portraits of people in the woods. The person is really crisp and the background is barely distinguishable, so the leaves and the light look really cool. Just be sure that you have a lot of space to move around!
 18-105mm: This is the "widest" lens that I have. It also has the ability zoom but it's much less dramatic, so in contrast to the last lens, is good for shooting in smaller spaces. I don't use it TOO much but I know a lot of photographers who make great use of it.
 Holga: This lens is SO much fun to play around with! It's meant to look like a Holga camera. Doesn't do too bad of a job, in m opinion. It has a grainy'ness about it that I just love. I've even been finding ways to use it in weddings. This lens isn't very functional but I use it more than I thought I would. It mixes it up every once in a while!
 What you'll need: A "Make Your Own" moccasin kit, (these can be found at your local craft store and range from $15 - $22) two crochet doilies, fabric glue, one of those sponges on a stick (no idea what the real word for it is) and a pair of sharp scissors.
 Start out by coating the toe piece with a thin layer of fabric glue. Place the doily wherever your heart desires and let the glue dry. Once it is firmly attached (a.k.a. when the glue is dry) trim the doily so there is 1/2" - 3/4" extra on all sides.
 Follow the instructions for putting the shoe together. When you get to the toe portion, fold the extra pieces of doily under and string the lace through them, just for added strength and to make sure that the ends don't fray. Once the moccasin is put together, repeat with the other one!
