Showing posts with label DIY. Show all posts

neon thread + pleather bracelet

neon, leather, bracelet, jewelry
I'm not going to lie to you, when I started seeing neon everywhere as the big thing for this season, I almost moved to France for the summer. (I felt as if I would have a better chance of not having to deal with all of those fluorescent colors there. I guess even though I've been there and know that it's not true, part of my wants to believe that everyone there wears all black all the time.) I don't really like neon and it doesn't like me. Something about my eternal paleness I suppose? If you've been around here for a while, you know that I cling to neutral colors. It's sad, I really need to try to change things up every once in a while. Being a (generally) proactive person, I decided to take a tiny step in that direction and add some bright colors to my repertoire with this simple little craft. 

You'll be able to find plain pleather (or real leather) cuffs like this at your local craft store. I wanted to try a couple different methods of decorating them so I grabbed some with holes in them. The holes aren't necessary for this method. Along with the bracelets, you're going to need some thread. I chose bright pink, blue, and yellow. I love the way that these shades contrast with the brown. 

Begin by spreading a thin layer of glue on the back of the bracelet. Since you'll be working in small sections, just add glue to where your first color section will be. Take the spool and wind it tightly around the pleather. Do this until no brown is showing through. Repeat this with all of the colors. When you reach the end, use a tiny bit of glue to hold down the ends of the thread.


neon, leather, bracelet, jewelry
I love the way that this bracelet looks. It's great for when I want to add a little pop of color but not too much color, because... ya know. Baby steps!

xo,
e.m.

some peter pan

Last week, a friend and I had a mini craft-fest. We made these. NO, they are not boobs. They are collar necklaces. I'm aware that they totally look like breasts with little heart nipples. Now that I've said it, let's move on. This is a really easy craft to do if you have some free time. I love Peter Pan collars because they can add SO much to an outfit. I can't wait to pop my white lace one over a plain black dress. 

For this craft, you probably have all that you need lurking in your craft room. If not, it'll only set you back about $1.50. Feel free to add any embellishments that you may see fit. Jewels or studs would be really cute on this craft!

Fold your piece of felt in half and trace your desired shape. Could be pointed, rounded, scalloped, whatever you want! Cut it out, unfold it, and you should have two identical halves. After that, the rest is up to you. I sewed on some little hearts and some lace. Maddy made some heart cut-outs on hers. After you're done decorating, figure out how long you'd like the ribbon for your necklace to be. Attach it with a few stitches or some fabric glue, whichever strikes your fancy. Happy crafting!

xo,
e.m.

diy fox barrette

I'm heavily indulging in the new trend of "wearing animals on everything." Any excuse to add a little more cuteness in my life is a good one. I definitely want to do more cute animal crafts like this. I mean, how can I not? It's ADORABLE and felt is so inexpensive! This is one of my favorite DIYs yet and it's a win on every level.


For this craft, you will need stiff orange felt, soft off-white felt, soft black felt, scissions, a hot glue gun, plain barrettes, grey thread and a nice, thick needle. As far as the shape of the fox goes, it's quite easy to freehand. Just an upside-down triangle with two triangle ears. I drew it with a pencil right on the felt. Cut out the pieces and use the hot glue gun to attach them to each other.


After gluing the pieces on, your fox will look a little bit like this. To make sure that he doesn't fall apart, stitch the pieces on. It doesn't have to look perfect, that's the beauty and the charm of it! (See first photograph.)

redhead, joy division, fox, barrette, animal, hairpiece
I haven't worn this little guy out yet but I can imagine that I'll get a few compliments along with some weird looks. If you think he's cute but you wouldn't wear him in your hair, you could easily make him into a brooch.

xo,
e.m.

diy flower crown

flower, crown, red, rose, redhead, bangs, fringe, liquid eyeliner, sweater
I love huge hairpieces. I have big hair and I just love to make it look even bigger. (Hey, I'm from Jersey, remember?) I don't think that flower crowns should just be for the Spring and Summer. I'm also not saying that you should wear glittery plastic poinsettias on your head for the Christmas season but I am saying that if a girl wants to wear flowers in her hair, who cares about the weather? For my flower crown, I used fake red roses. Classy for any time of the year!

To make this, you'll need six faux roses, a plain headband and a hot glue gun. Start out by cutting the bulbs off of the stems and arranging the flowers on the headband to see which arrangement you like the best. I used a little piece of chalk to mark where I would like my flowers to start/stop. Then, simply hot glue the flowers in place. I glued some of the leaves from the flowers on to the back to cover up the bottoms of the bulbs where I cut them off of the stems and to fill it in a little more. 

red, rose, flower, crown, diyLovely, right? I can't wait to wear mine to a Christmas party. Also, don't mind the HUMONGOUS dark circles under my eyes. Finishing up business for the year, planning a trip to China, planning what I'll be doing with my blog and business while in China and the general craziness of the Christmas season are starting to get to me a bit!

xo,
e.m.

diy feather bunting

diy, bunting, feather, garland, lace, glitter, cute, home, decorY'all know how I feel about glitter and that I have a thing for birds, so naturally, anything that involves both will have me jumping for joy. This craft certainly does! I love the idea of bunting. It's a simple piece that can make a statement and a subtle but huge change in a room.

For the bunting, you'll need feathers (available from the craft store), Elmer's glue, glitter (I used gold) and lace ribbon. (Or any type of ribbon, I just thought that the lace looked really pretty.) I used almost an entire roll of ribbon so depending on how long you'd like your bunting, plan accordingly. 

Dip your feathers into the glue, wiping off any excess. Dip the glued end of the feather into the glitter. Shake off any excess and let dry. While the feathers are drying, take the ribbon and tie a knot every four inches or so. When the feathers have dried, slip the quill through the knot, tightening if you need to!

diy, bunting, feather, garland, lace, glitter, cute, home, decordiy, bunting, feather, garland, lace, glitter, cute, home, decorSo pretty and so festive!

xo, 
e.m.


diy owl ornament

One of the brides who I've worked with is as obsessed with owls as I am and sent me this easy little DIY to make these adorable cuties. It was such a fun craft to do while watching a Christmas movie that I decided that I must share it with you guys. For mine, I changed the pattern a bit. I used toile for the belly and embroidered little x's for eyes. Take this simple pattern and make it your own! Also, a little fun fact, I stuffed mine with cotton balls because I didn't have any fluff laying around the house! Crafts are all about being resourceful, right? Either way, these would make cute gifts for anybody on your list. 

xo, 
e.m.

Also, while you're surfing this blog, be sure to enter the Shabby Apple Giveaway! It's a good one.

decorative bottles: two ways

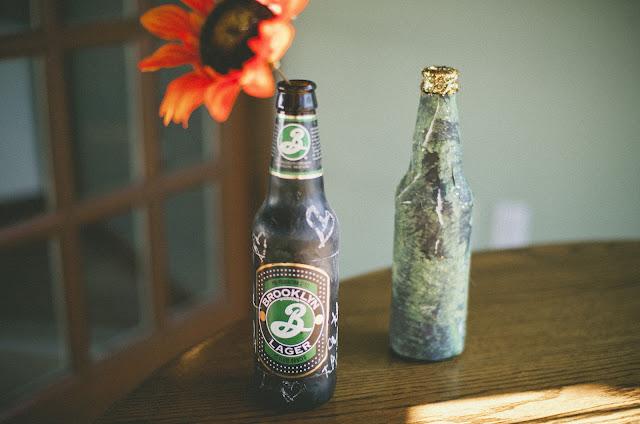
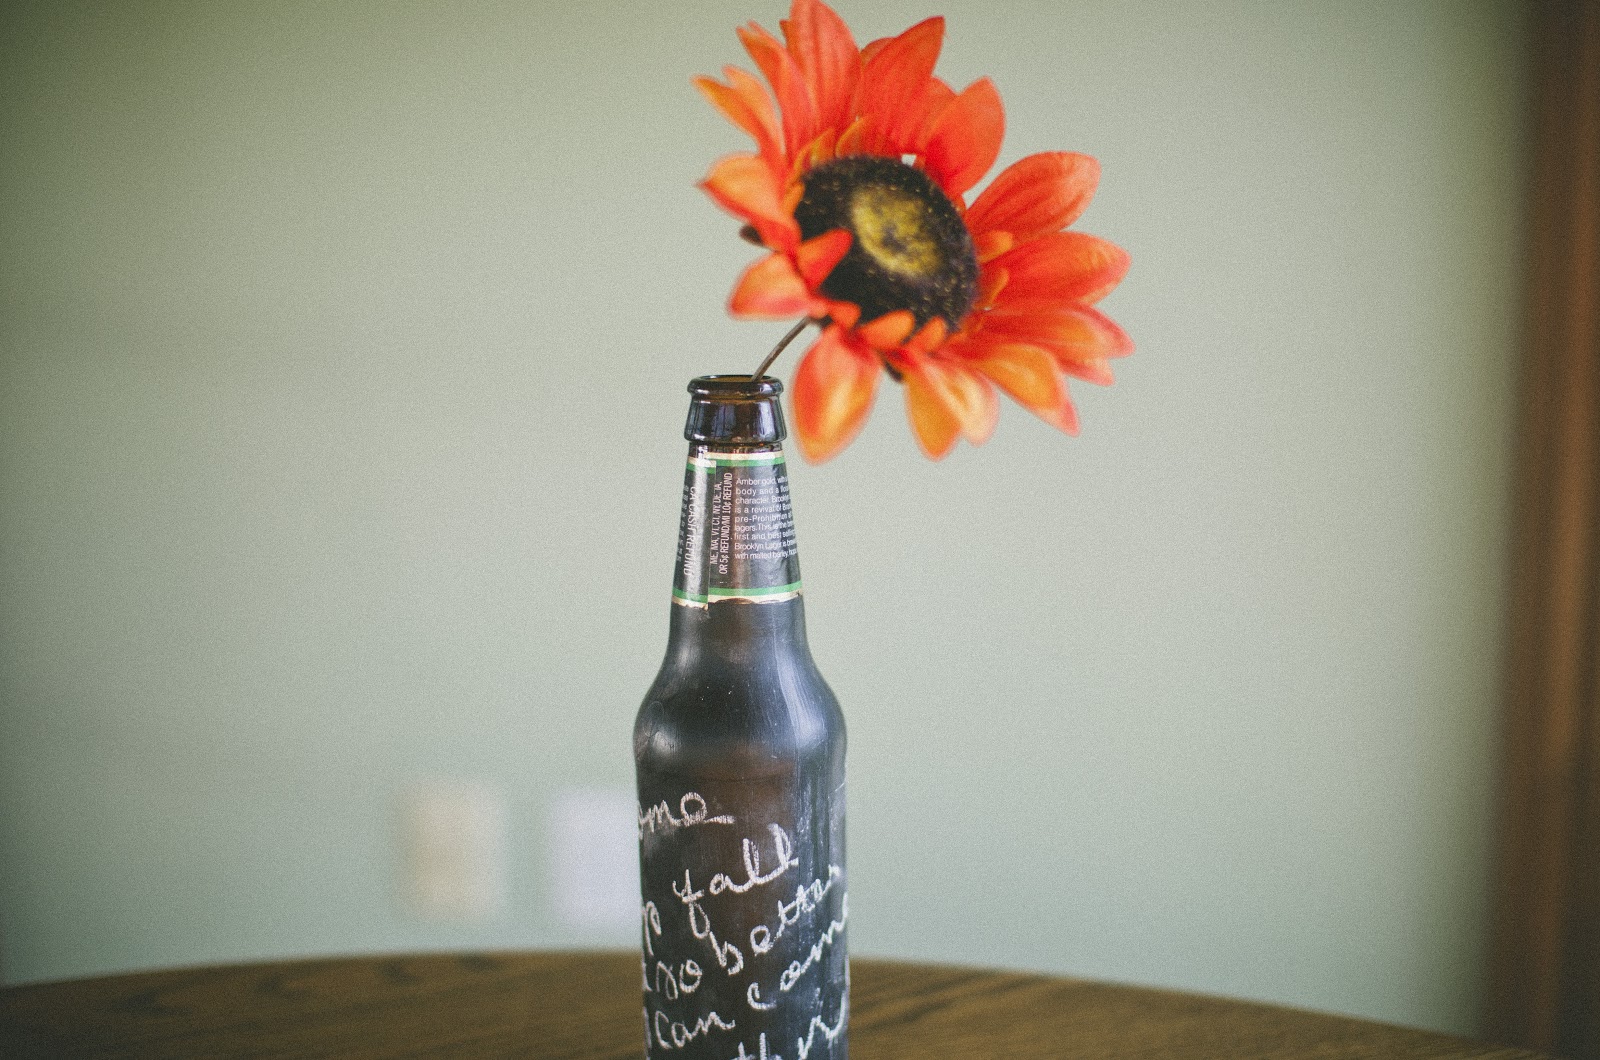
chalkboard paint, bottle, DIY, Brooklyn Lager, vase, I feel like little home'y details, when bought at the store, can cost a LOT of money. Does anybody else feel that way? That's why lately, I've been trying to figure out what I can recycle and what little craft supplies I have laying around my house I can use to make something new and unique for my office. Lots of plain walls, in need of a subtle pop of SOMETHING. I didn't have to look far for an easy little craft to brighten up my workspace! Here's what I came up with:

What you'll need: Glass bottles-- I used beer bottles but glass soda bottles, milk bottles, juice bottles,  or basically any other glass container could work, scrapbook paper, glitter. chalkboard paint, Elmer's glue, water, and whichever other little embellishments you would like to add.

1. Decoupage: If you have never decoupaged before, it it incredibly easy. You will need scrapbook paper, Elmer's glue, and water. Begin by mixing mostly glue with a little but of water. Rip or cut pieces of scrapbook paper (depending on the look you want to achieve) and, one at a time, generously coat the bottom with the glue mixture. Place it on the bottle and coat again in the glue. Continue until the entire bottle is covered.

2. Chalkboard Paint: I left on the label of my bottle because I think it's awesome. (It was designed by Milton Glaser, of whom I am a HUGE fan.) If you want to take the label off, soaking the bottle in warm soapy water usually helps to get it ALL off. Paint the surface of the bottle with the chalkboard paint, let dry, and cover with another coat.

I dipped the top in glue and glitter to add a little bit of fun. I also experimented with some lace and burlap to make a cozy decorative mantle piece that would be perfect for the upcoming Christmas season. Have fun adding your own personal touches!

xo, e.m.

diy doily tote

Never underestimate a doily and some fabric glue. Ever. (Remember my lace moccasin DIY?) Today, I made this cute little tote bag and it was easy as pie! It's perfect to carry your books to class or your groceries from the store and would make a perfect gift.

What you'll need: A blank tote bag, (any color!) a doily of any size, some fabric glue and that sponge-stick thing.

Begin by placing the doily on the bag to see where you'd like it to be. Put some glue on that bad boy and stick it in its place. Wait for it to dry and... voilĂ ! Instant cute.

Happy crafting!

xo, 
e.m.

how to brew kombucha:

kombucha, home, DIYKombucha is sort of a miracle beverage, although I think it's actually technically a food. A lot of people think that it's a mushroom but it's actually a fermented symbiotic colony of bacteria and yeast. Delicious, right? Don't let that fact scare you though, it's good for you! There are various health benefits attributed to Kombucha such as preventing cancer and helping out your digestive system. Interested? Here's some more information as well as where to order a culture. A friend came over a few weekends ago and showed me how to brew my own, which I'm excited to share with you guys!

To brew your own kombucha at home, you will need about a gallon of filtered water, 6-8 tea bags steeped in 6 cups of water overnight, (black tea works really well) a heaping cup of sugar, (essential to the fermentation process) a large glass pot, (one with a spigot works amazingly, if not, you'll have to use a ladle to get the tea into a cup) a piece of cloth to place over the top, a strong rubber band, a ribbon (if you wanna make it look pretty) and some kombucha culture. (See the link above!)

kombucha, home, DIYTwenty-four hours before you prepare your kombucha, place your filtered water into a glass vase and let it sit. This will evaporate the chlorine out of it. The night before, steep 6 or so bags of tea overnight in a separate vase. In the morning (or whenever you want to start making your tea) mix both the water and the tea in a larger glass pot.


Add your sugar and stir! It's pretty self-explainaory. So much easier than you ever thought, right?

After mixing the sugar in the best you can, add your culture. We used a culture from my friend's own brew at home.

Cover your kombucha with the cloth and place out of direct sunlight. I keep mine in an empty space under my counter to keep it out of the sunlight. Because the culture that I used wasn't as far along in the growing process, I let mine ferment for two weeks. Depending on your culture, it could take as little as one week. Check on it often. You'll see this weird mushroom-looking thing growing on the top of it. That's good! It means that your tea is ready. Start but drinking about 2oz a day to get your body used to it and work your way up to 8oz. All that you need to do to replenish your kombucha supply is add more sweet tea. If you do this, one culture can last you a lifetime! Cheers!

xo, e.m.