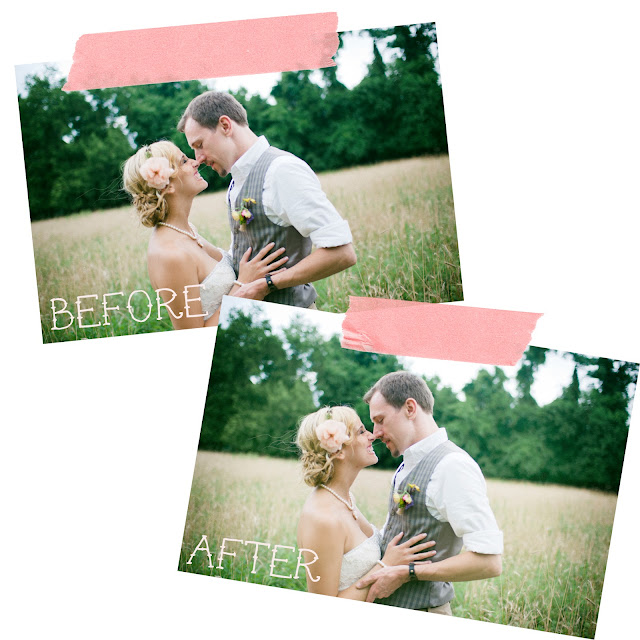
 Confession: I've always been a little hesitant to share some of my secrets with y'all because well... ya know, my photography business is the only income I have and a girl's gotta eat! I realized though that there's no better way to get the creative juices going than to share the goodness! I'm so appreciative for things that I've learned from other photographers so here is a trick that I learned and use a lot, and you'll probably use a lot too! The idea is to add a subtle hazy glow to your photographs. While it is definitely subtle, the difference is, in ways, drastic. More attention will be drawn to the main subject if you do it right, so here's how:
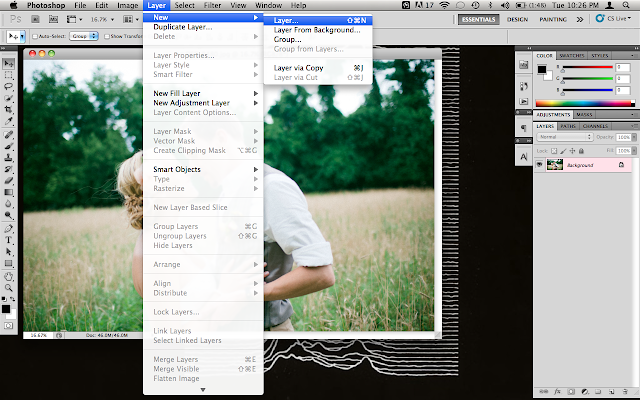
 2. Add a new layer.
3. I'm kind of... "obsessive"... so I name and color-code all of my layers. You can skip this step if you're not as crazy as I am.

4. Pick a brush, a color, and an opacity. Make sure that the hardness is set on 0% and that you choose a light color, preferably one that compliments your photo's color scheme. I've found that a larger brush works best, and the level of opacity changes with every picture. Play around and find out what works best!

5. Make sure that your new layer is selected and that you're not drawing directly on the photograph and go to town. I like to "highlight" my subject with the brush but every photo is different. Once again, play around with it because it's supposed to be fun!

6. There will be a little drop-down box above your layers that says "Normal." I believe that this is the list of "Blending Modes." Click on it and select "Soft Light."

 7. Your brush strokes will instantly blend with the photograph. Feel free to leave it the way it is or to play around with the opacity a little.
 Viola! It's subtle but it certainly makes a difference! Have fun playing around with photographs, trying out different brush size and color combinations and creating new works of art!
xo, e.m.


